Starter Hypercube
The Starter Hypercube can be solved with Sequence 4C-C1, the setup compares to the regular cube as shown below. This sequence is used several times to solve both the top and bottom cells. For the setup it is only necessary to have two misplaced cubies in the positions shown on the front cell, the rest do not have to be already solved.
|
|
|
Also, another operation from the regular cube is used to move the misplaced cubie from the right cell to the front cell to make the above setup as shown.
|
|
|
The solve process is to use half-twists, rotation of the whole hypercube
or the above operation to make the setup for Sequence 4C-C1, apply the sequence
to fix two cubies and then repeat the process until done.
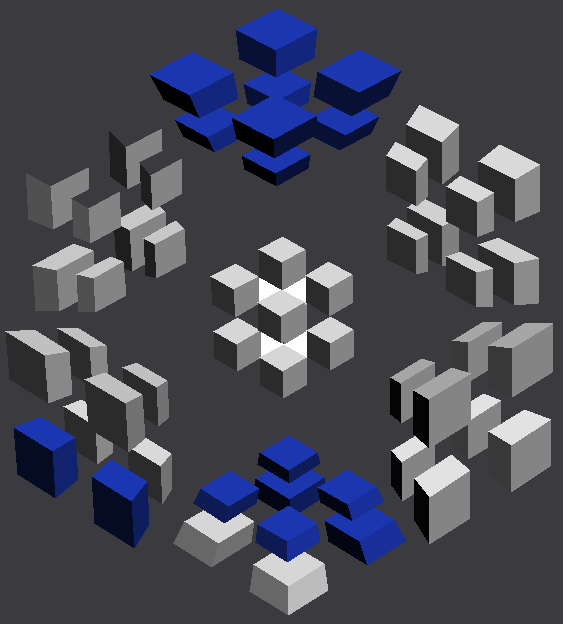
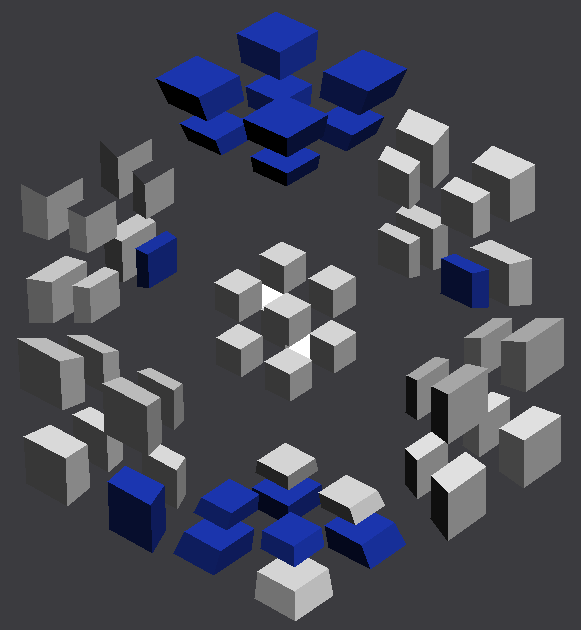
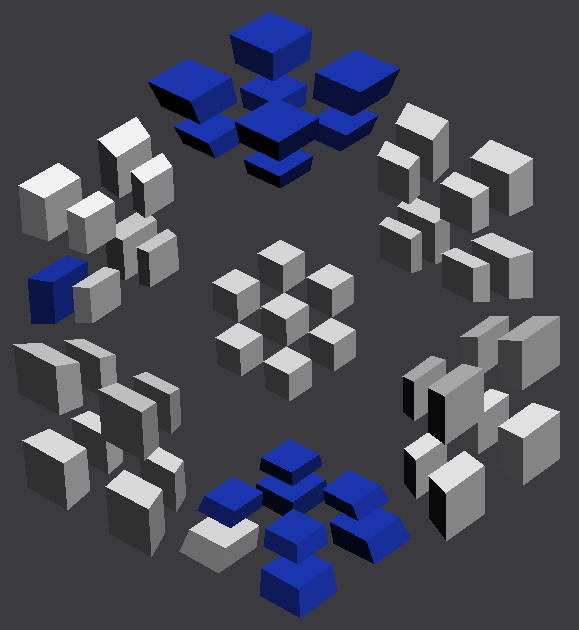
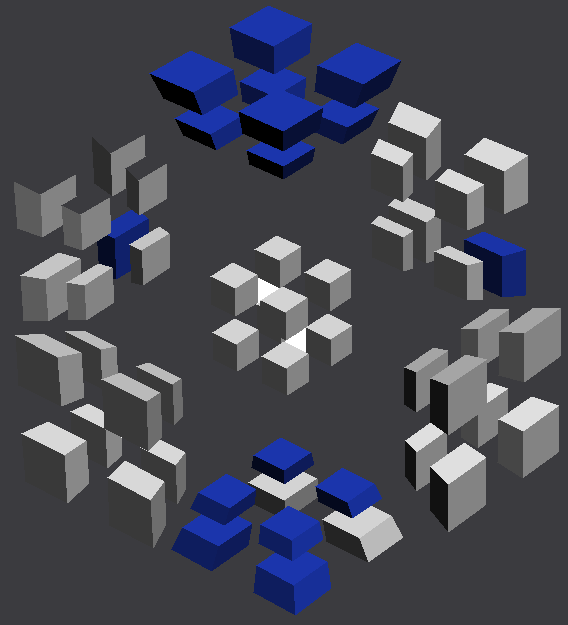
While solving, the first image below shows a typical example of the setup
for Sequence 4C-C1.
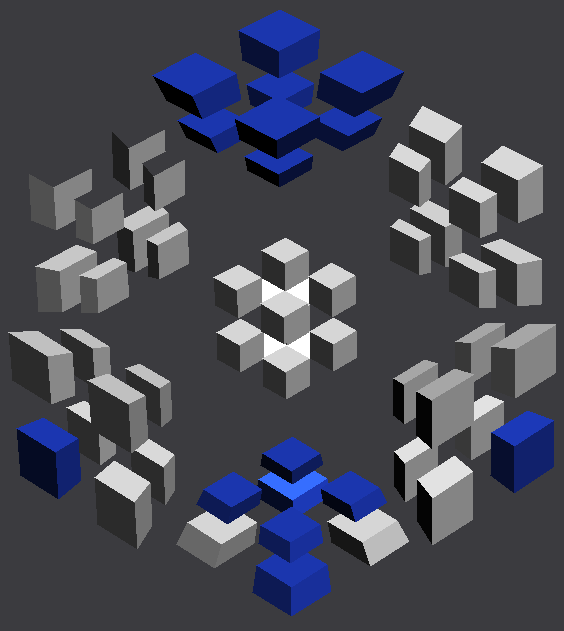
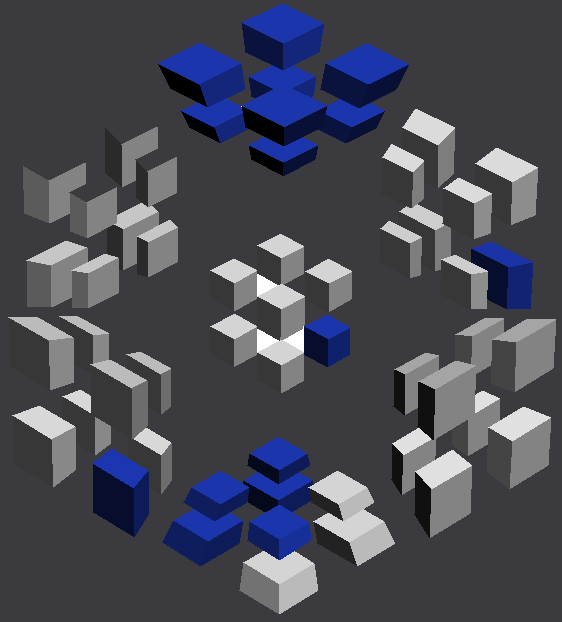
The second image shows the result of 4C-C1 being applied.
While it may appear at first glance that the two cubies are just moved
to the adjacent positions on the bottom cell, that is not the case.
Where they actually move to is irrelevant and the only thing that matters
is that there are now two less misplaced cubies and two more that are
"solved" in that they are somewhere on either the top or bottom cell (there
were seven before and nine after).
|
|
In some cases the setup for Sequence 4C-C1 can not be made as described
above so do one of the following:
1. Use a quarter-twist of U or U' on the front, right, back or left cell
to move a misplaced cubie so the setup can be made.
2. Use Sequence 4C-C1 to fix one misplaced cubie.
3. If only one misplaced cubie remains then use 4C-C1 to misplace a solved
cubie.
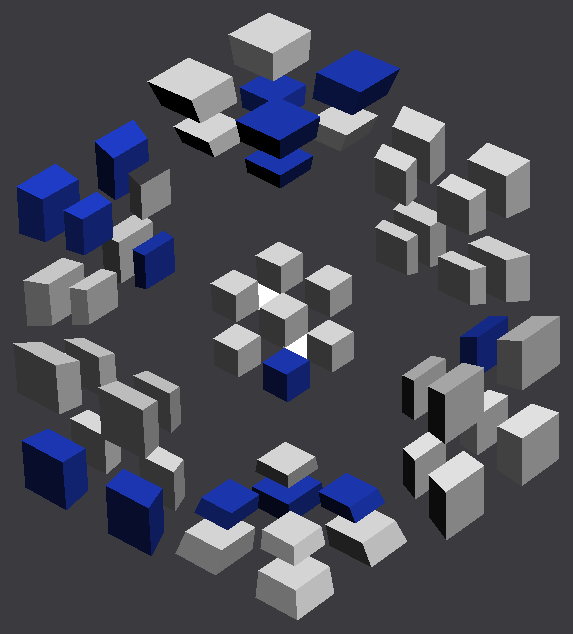
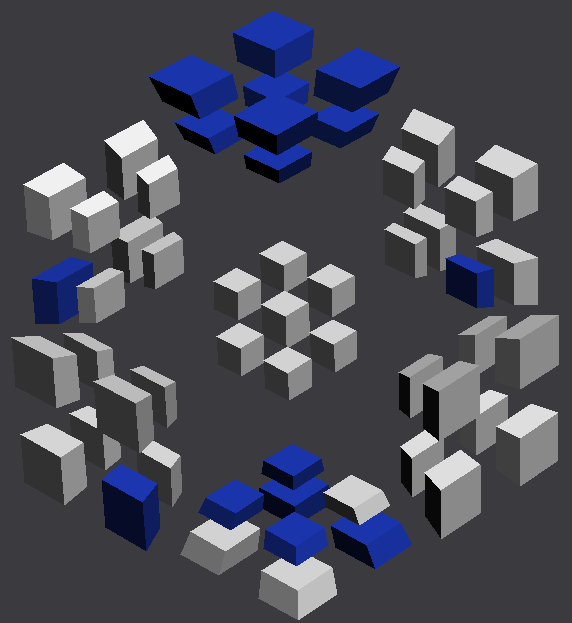
The first image below shows a configuration where the setup for 4C-C1 can not
be made using half-twists.
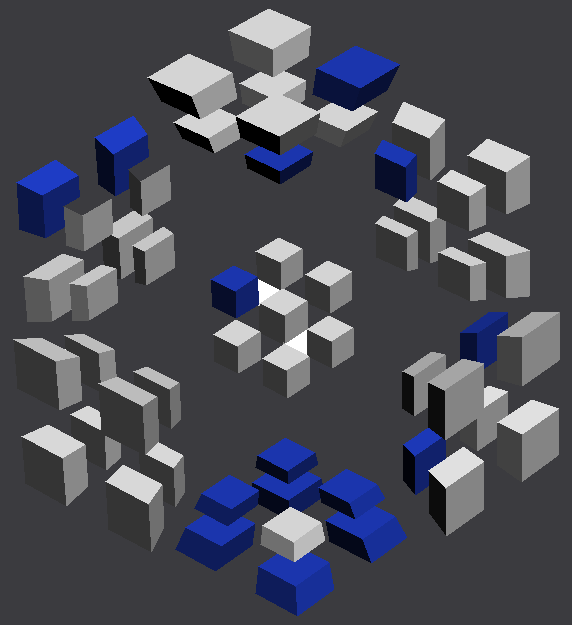
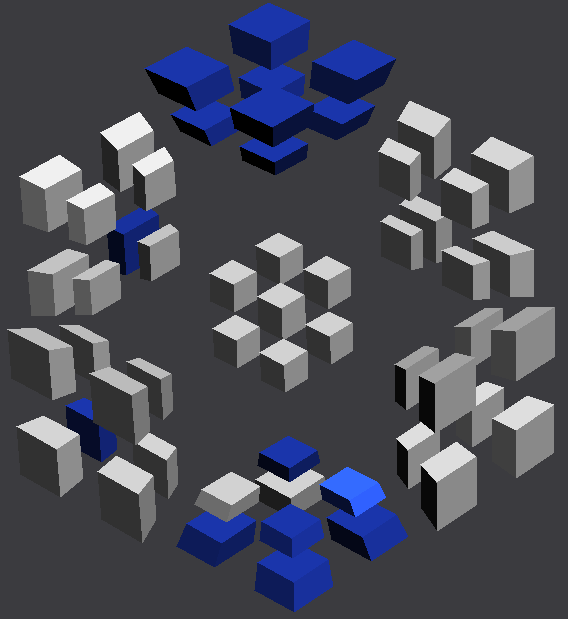
The second image shows the result of a quarter-twist (U') of the back cell,
the setup for 4C-C1 can then be made by doing B2 L2.
|
|
The second option of fixing one misplaced cubie can also be used but if Sequence 4C-C1 is applied to the first image above the result will be no change in the number of misplaced cubies because while the misplaced cubie on the front cell will get fixed the one on the bottom cell will get misplaced. To make it work the two locations on the bottom cell must both be gray. That can be done by doing a push (with Magic Cube 4D press the middle-mouse button on a cell to push it into the center) on the back cell twice which results in the first image below. Applying Sequence 4C-C1 results in the second image which shows that one misplaced cubie is fixed (three were misplaced before, two after). In this example the proper setup was made by simply doing a rotation of the hypercube but often it requires some manipulation with half-twists.
|
|
For the third case where only one misplaced cubie remains, turn the hypercube so the misplaced cubie is not on the front cell and so that there is one blue cubie on the bottom cell located such that it will get misplaced by doing Sequence 4C-C1 as shown on the first image below (could also be the mirror-image configuration). The second image shows the result of doing 4C-C1, there are now two misplaced cubies which can be solved as described above (U2 the whole hypercube then U' the right cell to match second image on this page).
|
|